Importing data into Raven using HTTP with Python
Welcome to this tutorial on importing data into the Raven Portal using the HTTP Source Brick and Python. We will guide you through each step, making data integration a simple process.The first three chapters of this tutorial are identical to the previous one. If you are already comfortable with setting up Flows and getting started, you can jump ahead to Chapter 4.
Chapter 1: Getting Started
To begin, let's create a data source in Raven Portal using the HTTP Source Brick. First, we need to establish a Flow.
Access the Flows App: Start by selecting the "Flows" app located in the left menu of the Portal. Here, you can view all previously created Flows by your team and yourself.
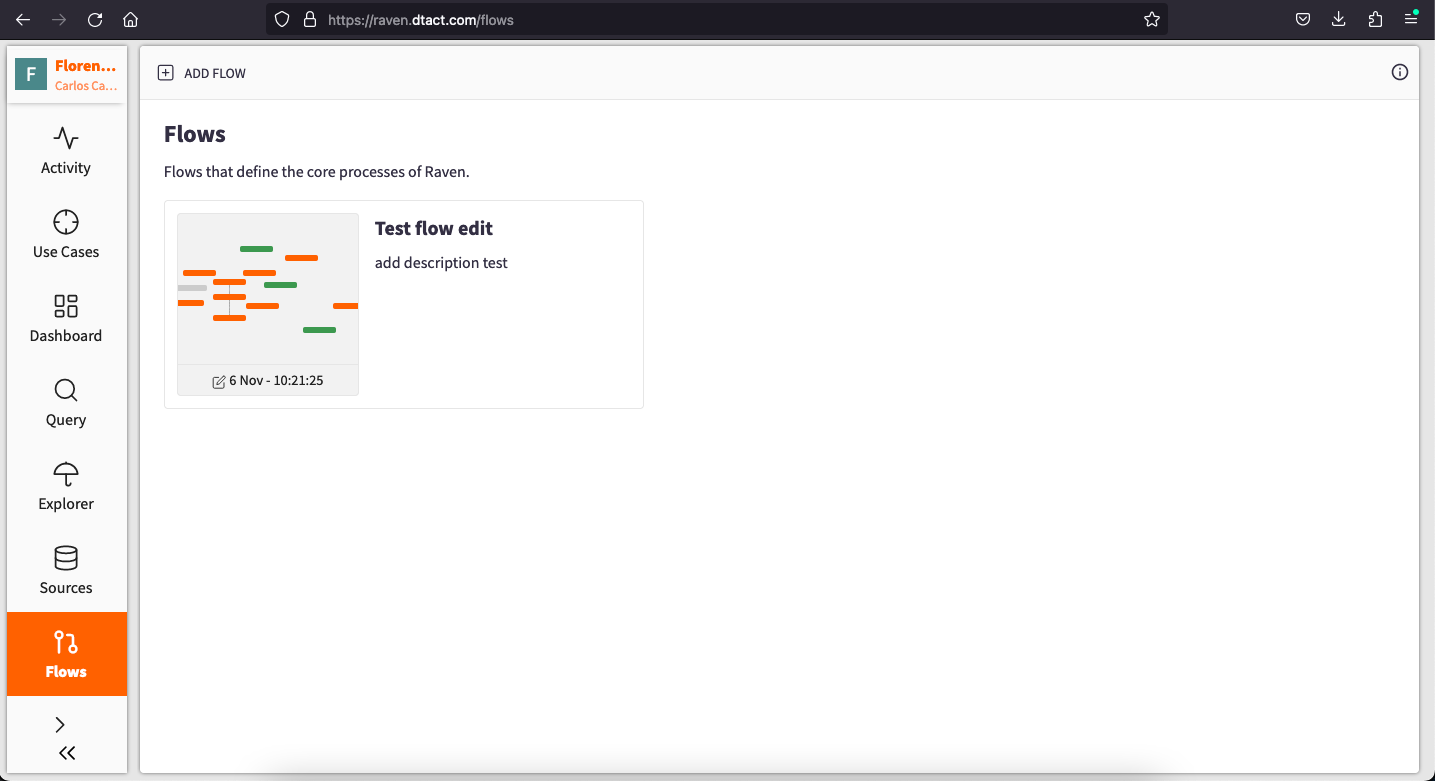
Chapter 2: Creating Your Flow
Now, let's set up your first Flow within the Raven Portal:
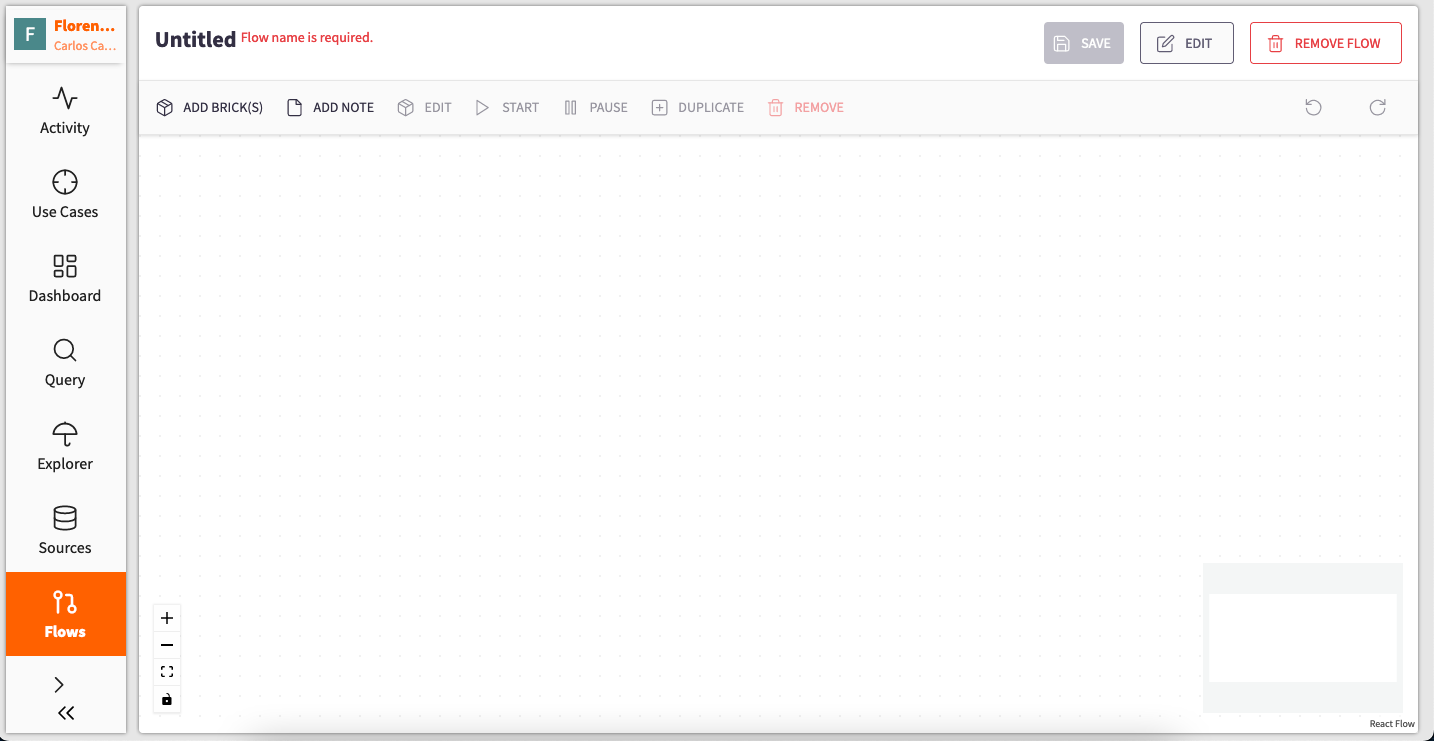
- Flow Creation: Click on the "ADD FLOW" button at the top of the page. This action will open a tab where you can add Bricks and configure your Flow.
-
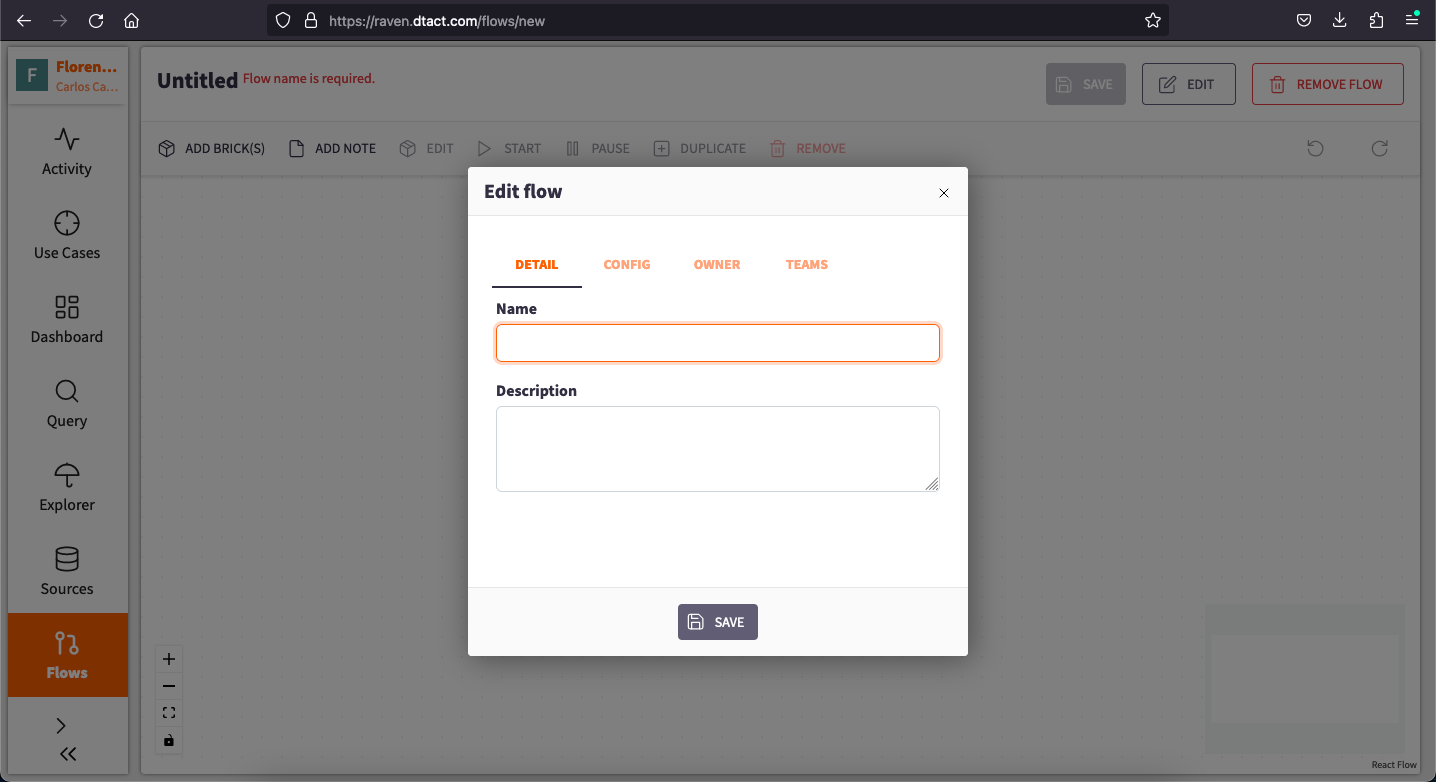
Provide Flow Details: To begin, assign a name and description to your Flow. This is essential for saving and managing your Flow. Click the "Edit" button located at the top right corner to access a pane with three sections.
-
The first section lets you specify a Name and Description.
-
The second section allows you to change the owner of the Flow.
-
The third section permits you to add teams that can access the information within your Flow.
-
-
Save Your Flow: After configuring these details, press "Save" at the bottom of the pane to create and begin working with your Flow.
Note: Always remember to save your Flow after configuration to continue adding Bricks and preserving your changes.
Chapter 3: Adding the Source Brick
Now that you've established your Flow, it's time to introduce Bricks:
-
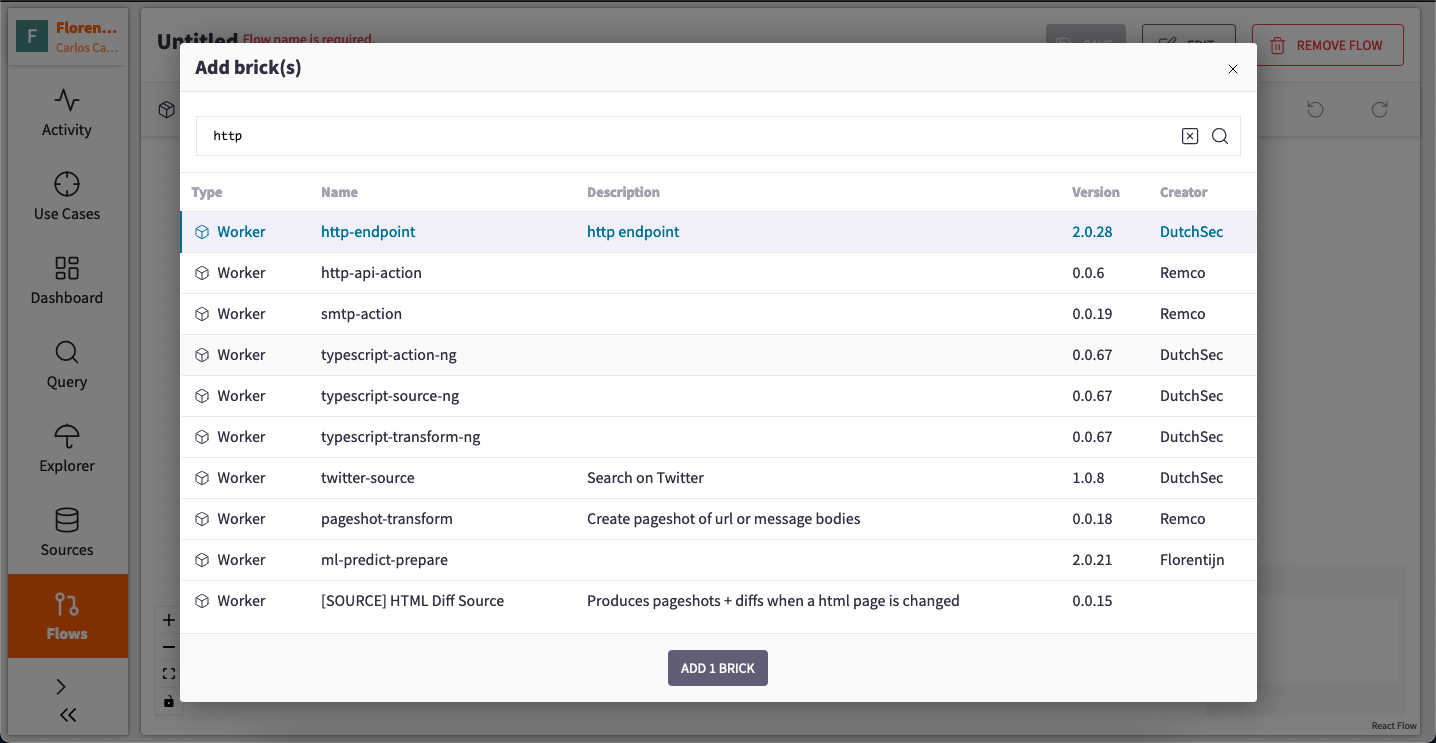
Introducing the Source Brick: To start, click on the "ADD BRICK" button to display a pane showcasing all available Bricks.
-
Selecting the HTTP Source Brick: Locate the "http-endpoint" Source Brick, which you intend to use, and press the "ADD 1 BRICK" button at the bottom of the pane.
-
Configuring the Brick: Now that you have the desired Brick in your workspace, it is time to configure it. Start by giving it a name through a simple double-click.
-
Saving Your Progress: After providing the name, press the "Update" button at the bottom of the pane, and be sure to save your Flow on the main page to retain your changes.
-
Brick Information: Upon saving the Flow, you will find additional information about the Brick in the right pane, known as the Brick Inspector. Here, you can access details such as Brick ID, Notes, Status, and Total messages processed.
Chapter 4: Providing Data to the Source Brick
Now that we have our Source Brick in place we can start injecting it with information through a Python code. Here we will show two ways to push data to the Brick. The first will be to push data directly on the Python code, the second one will be by pushing JSON document we have in our computers.
by personal preference I use a notebook when coding so the example will be done on a Jupyter notebook, but do not feel obliged to do your coding there.
Chapter 4.1: Pushing data directly on python code:
To get started, open your notebook and enter the following command:
import requests
requests.post('https://[BRICK_ID].ingest.dtact.com', json={"data": "test"})
Now, let's break down the code to understand its components:
requests.post()`: This function is used to send an HTTP POST request.
'https://[BRICK ID].ingest.dtact.com'`: This is the URL or Brick ID to which the request is being sent.
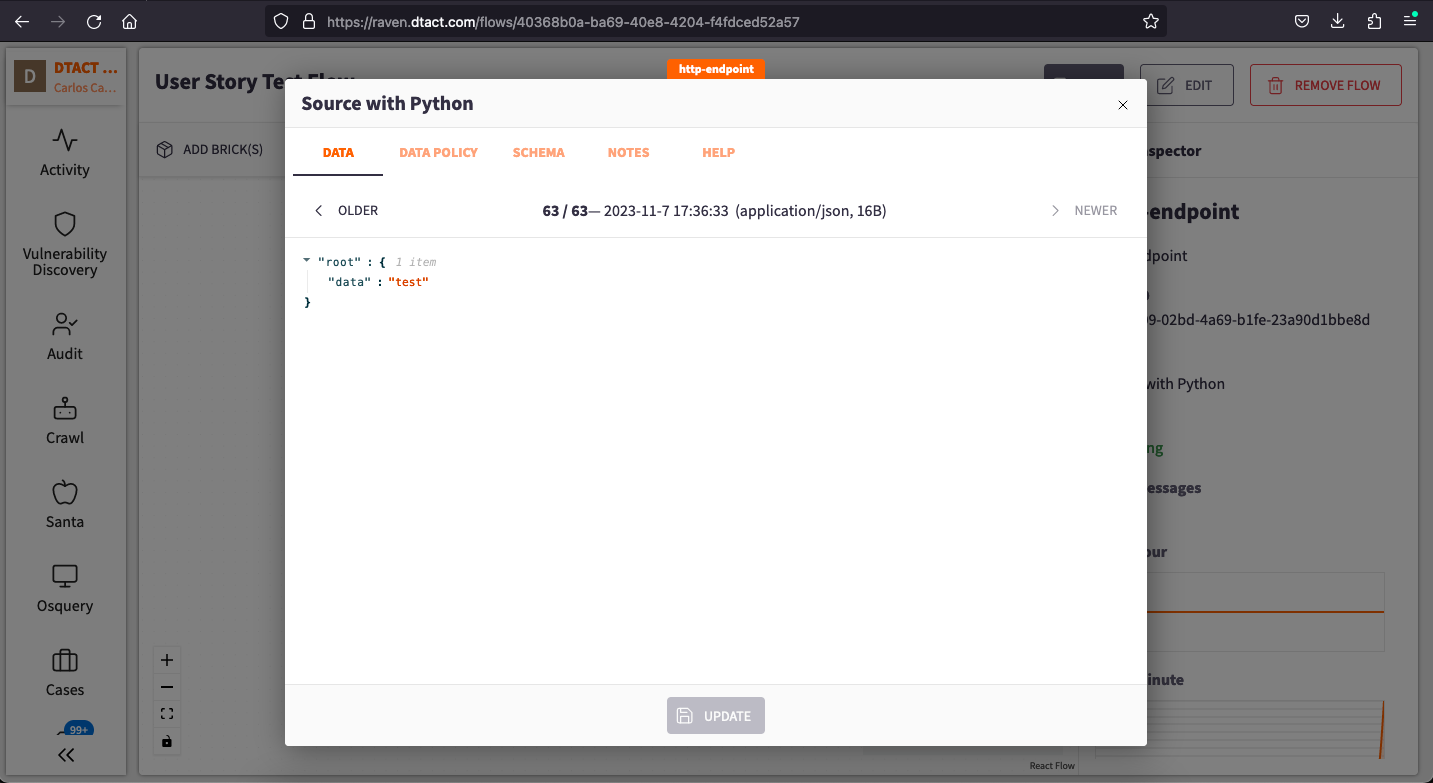
json=\{"data": "test"}: This part of the code sends a JSON payload with the request. In this case, it's sending a JSON object with a single key-value pair: {"data": "test"}. The server at the specified URL will receive this data.
After running this code, you can return to the Raven Portal and double-click on the Brick to observe the data flowing through it.
Chapter4.2: Pushing data from JSON files:
To push documents file all we need is to put the following command in our Jupyter Notebook:
import os
import json
import requests
ingest_url = 'https://[BRICK_ID].ingest.dtact.com'

for filename in os.listdir('jsondata'):
    if filename.endswith('.json'):
        with open(os.path.join('jsondata', filename), 'rb') as f:
            data = json.load(f)
            requests.post(ingest_url, json=data)
This code is performing the following actions:
Importing necessary modules: It starts by importing the required Python modules, including
os,json, andrequests.Defining the
ingest_url: It sets theingest_urlvariable to 'https://[BRICK_ID].ingest.dtact.com', which is the URL where the HTTP POST requests will be sent.Iterating through files in the 'jsondata' directory: It uses a loop to go through the files located in the 'jsondata' directory. The loop iterates through each file in that directory.
Checking file extensions: For each file, it checks if the filename ends with '.json'. This is done with the
filename.endswith('.json')condition, which ensures that only JSON files are processed.Opening and reading JSON files: When a JSON file is found, it opens and reads the file using
with open(os.path.join('jsondata', filename), 'rb') as f:. The JSON content is then loaded from the file into a Python object usingjson.load(f).Sending an HTTP POST request: It sends an HTTP POST request to the
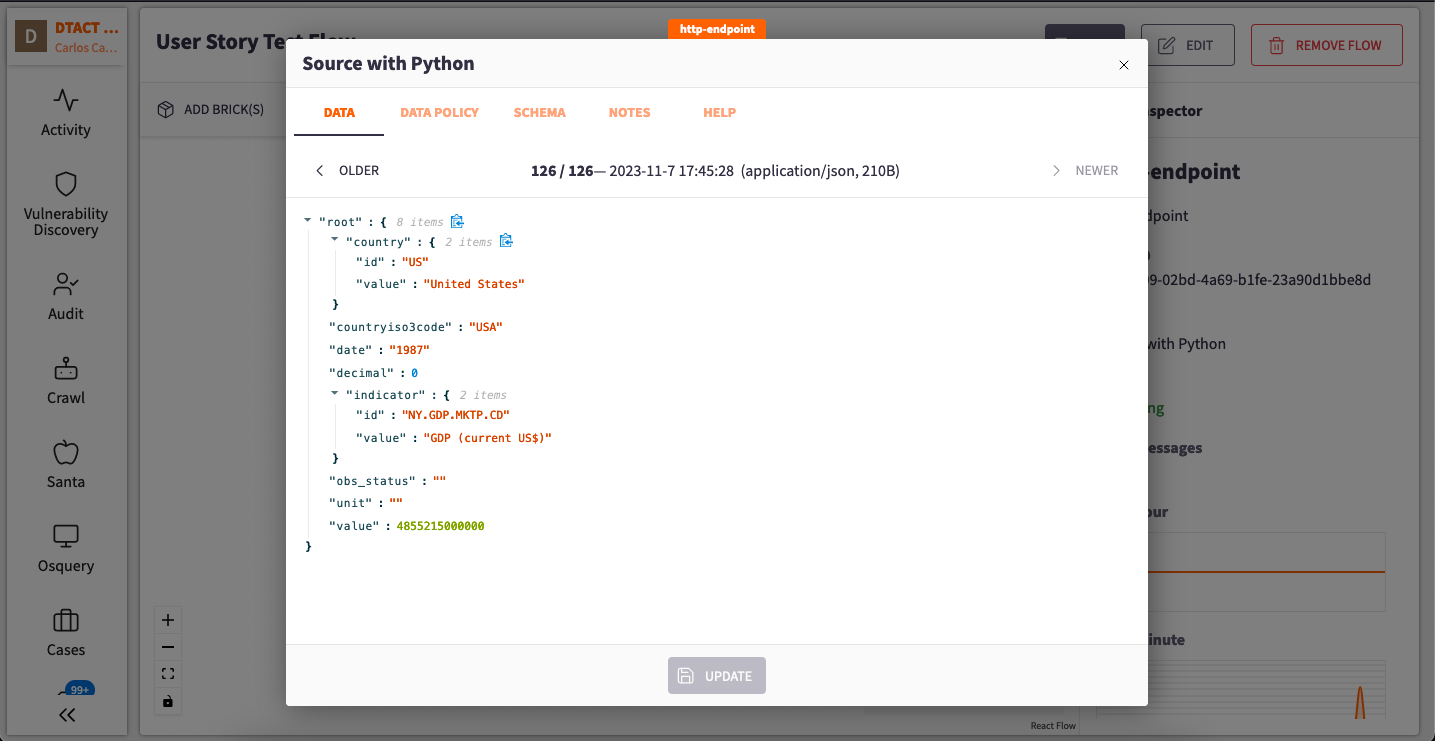
ingest_url, and the data from the JSON file is included in the request as JSON content. This is done withrequests.post(ingest_url, json=data).
After running this code we can return to our Flow in the Raven Portal and by double clicking on our Source Brick we will be able to see the data from our JSON documents running through the Brick:
Congratulations! Now yo know more ways of injecting data into the Raven Portal Flows using HTTP. After reading this tutorial you can continue to play with the data and organizing it in more user friendly ways with different apps of the Portal, such as Tables,Pane and Dashboards,etc.