Setting Up a Detection and Alerts
| Purpose | Equip the client with the knowledge needed to create a Detection, and to effectively visualize and manage alerts within the Raven Portal. |
|---|
| Created | September 10, 2024 |
|---|
| Components Used | Description |
|---|---|
| Brick Management | Brick management is a section of the portal where you can create, manage, and configure Bricks. |
| Detections | specialized detectors designed to spot specific anomalies in data from various sources. |
| Alerts | The Alert section in the Portal provides access to the Alert app, where you can review various alerts generated by different Usecases |
| Case Management | offers an overview of all Alerts generated by the various Usecases |
Part 1
Creating a Detection Brick
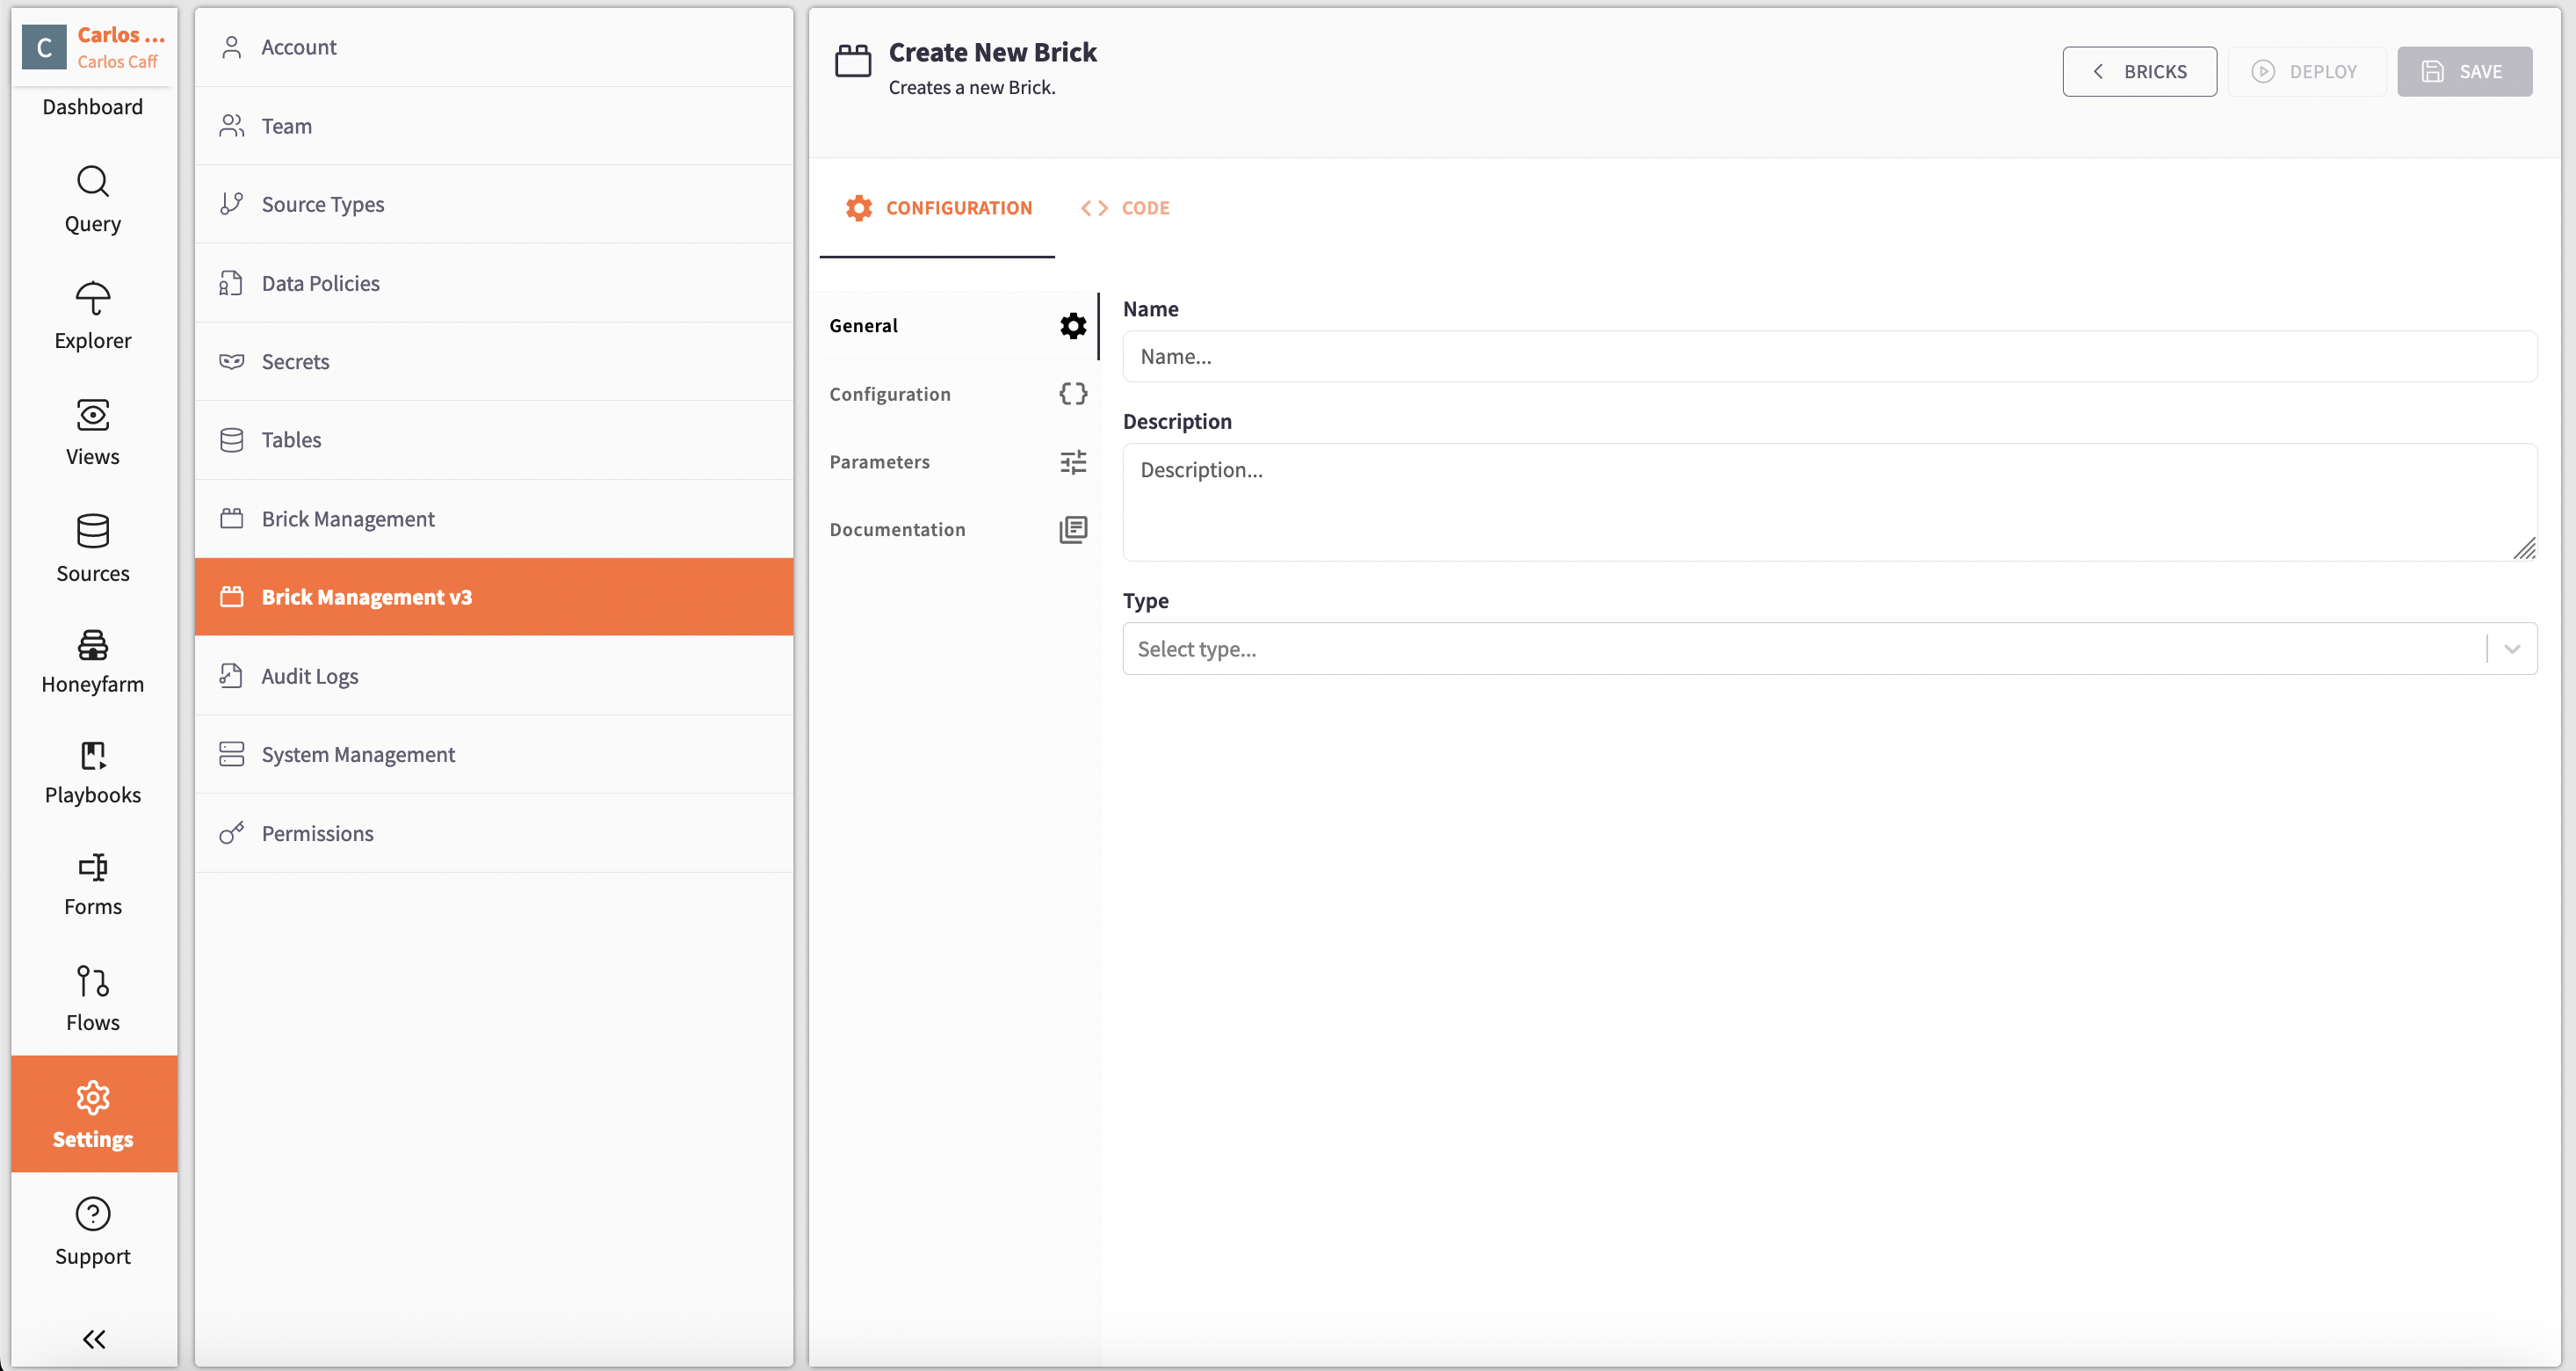
Access the Raven Portal: Navigate to the Raven Portal and go to the settings section. Locate the Brick Manager (v3), which will enable you to create new Bricks. Click the CREATE BRICK button in the top right corner.
Here we will find to sections:
A. Configuration Section:
Provide a name and a description for the Brick.
Choose the Brick type, which in this case should be the UseCase type.
B. Code Section:
This is where you will input the Python script to configure the desired UseCase.
Create a file to contain the script, and name it main.py.
Code example:
class UseCase(BaseUseCase):

    def __init__(self):
        super().__init__(self)
        pass

def run(self, last_run_at = None, **kwargs):

df = pd.DataFrame({

"Capital": ["Amsterdam", "Brussels", "London", "Berlin", "Paris"],

"Country": ["Netherlands", "Belgium", "England", "Germany", "France"],

"Population": [18001312, 12401324, 122818823, 293241142, 192714251]

})

for index, row in df.iterrows():

if row["Country"] != "Netherlands":

continue

# we should query for all events here, to get metadata

yield Alert(

title='Found the Netherlands',

description=None,

detection_id="cb6cd723-d349-4b29-9bba-1602f73fc282",

occurences=None,

tactic=None,

technique=None,

severity='INFORMATIONAL',

events=[row],

meta={

'Capital': row['Capital'],

'Country': row['Country'],

'Population': row['Population'],

},

)
Code explanation:
A. Class Definition and Initialization
class UseCase(BaseUseCase): This defines a new class UseCase that inherits from BaseUseCase. The BaseUseCase class likely contains some pre-defined methods or properties that UseCase will use or override.
def init(self):: The constructor method is called when an instance of UseCase is created.
super().init(self): This line calls the constructor of the BaseUseCase class, ensuring that any initialization logic in the base class is executed.
pass: This is a placeholder indicating that no additional initialization logic is needed in this method.
B. run Method
def run(self, last_run_at=None, **kwargs):: This method is likely the main method of the UseCase class. It takes an optional parameter last_run_at and any number of additional keyword arguments (**kwargs).
C. Creating a DataFrame
df = pd.DataFrame({...}): This creates a Pandas DataFrame df containing three columns: Capital, Country, and Population, with corresponding data for five European cities.
D. Iterating Through the DataFrame
for index, row in df.iterrows():: This loop iterates over each row in the DataFrame. iterrows() returns both the index and the row as a Series object.
if row["Country"] != "Netherlands": continue: If the Country in the current row is not "Netherlands," the loop skips to the next iteration, effectively filtering the rows to only those where the country is "Netherlands."
E. Creating a Detection ID
Every Detection has a individual detection_id which identifies for which Detection the alert was created. Here is how we obtain our own detection ID:
First we need to call the uuid (Universally Unique Identifier) generator Python module
detection_id = str(uuid.uuid4())
-
This will generate a random detection_id.
-
detection_id will hold our unique identifier
F. Generating Alerts
yield Alert(...): This creates and yields an Alert object for every row where the country is "Netherlands." The yield keyword makes run a generator function, meaning it will return an iterator that produces Alert objects one at a time as the function is iterated over.
The Alert object includes various parameters:
title='Found the Netherlands': A title for the alert.
description=None: No specific description is provided.
detection_id: A unique identifier for the detection.
occurences=None: The occurrences field is not specified.
tactic, technique: These might be related to specific tactics or techniques in the context of the application, but they are set to None.
severity='INFORMATIONAL': The severity level of the alert is informational.
events=[row]: The row itself is included as an event.
meta={...}: Additional metadata about the alert, such as the capital, country, and population from the row.
G. Save the UseCase Brick
Click the save button in the top right corner of the Raven Portal to save the UseCase Brick.
Part 2
Detection App Setup
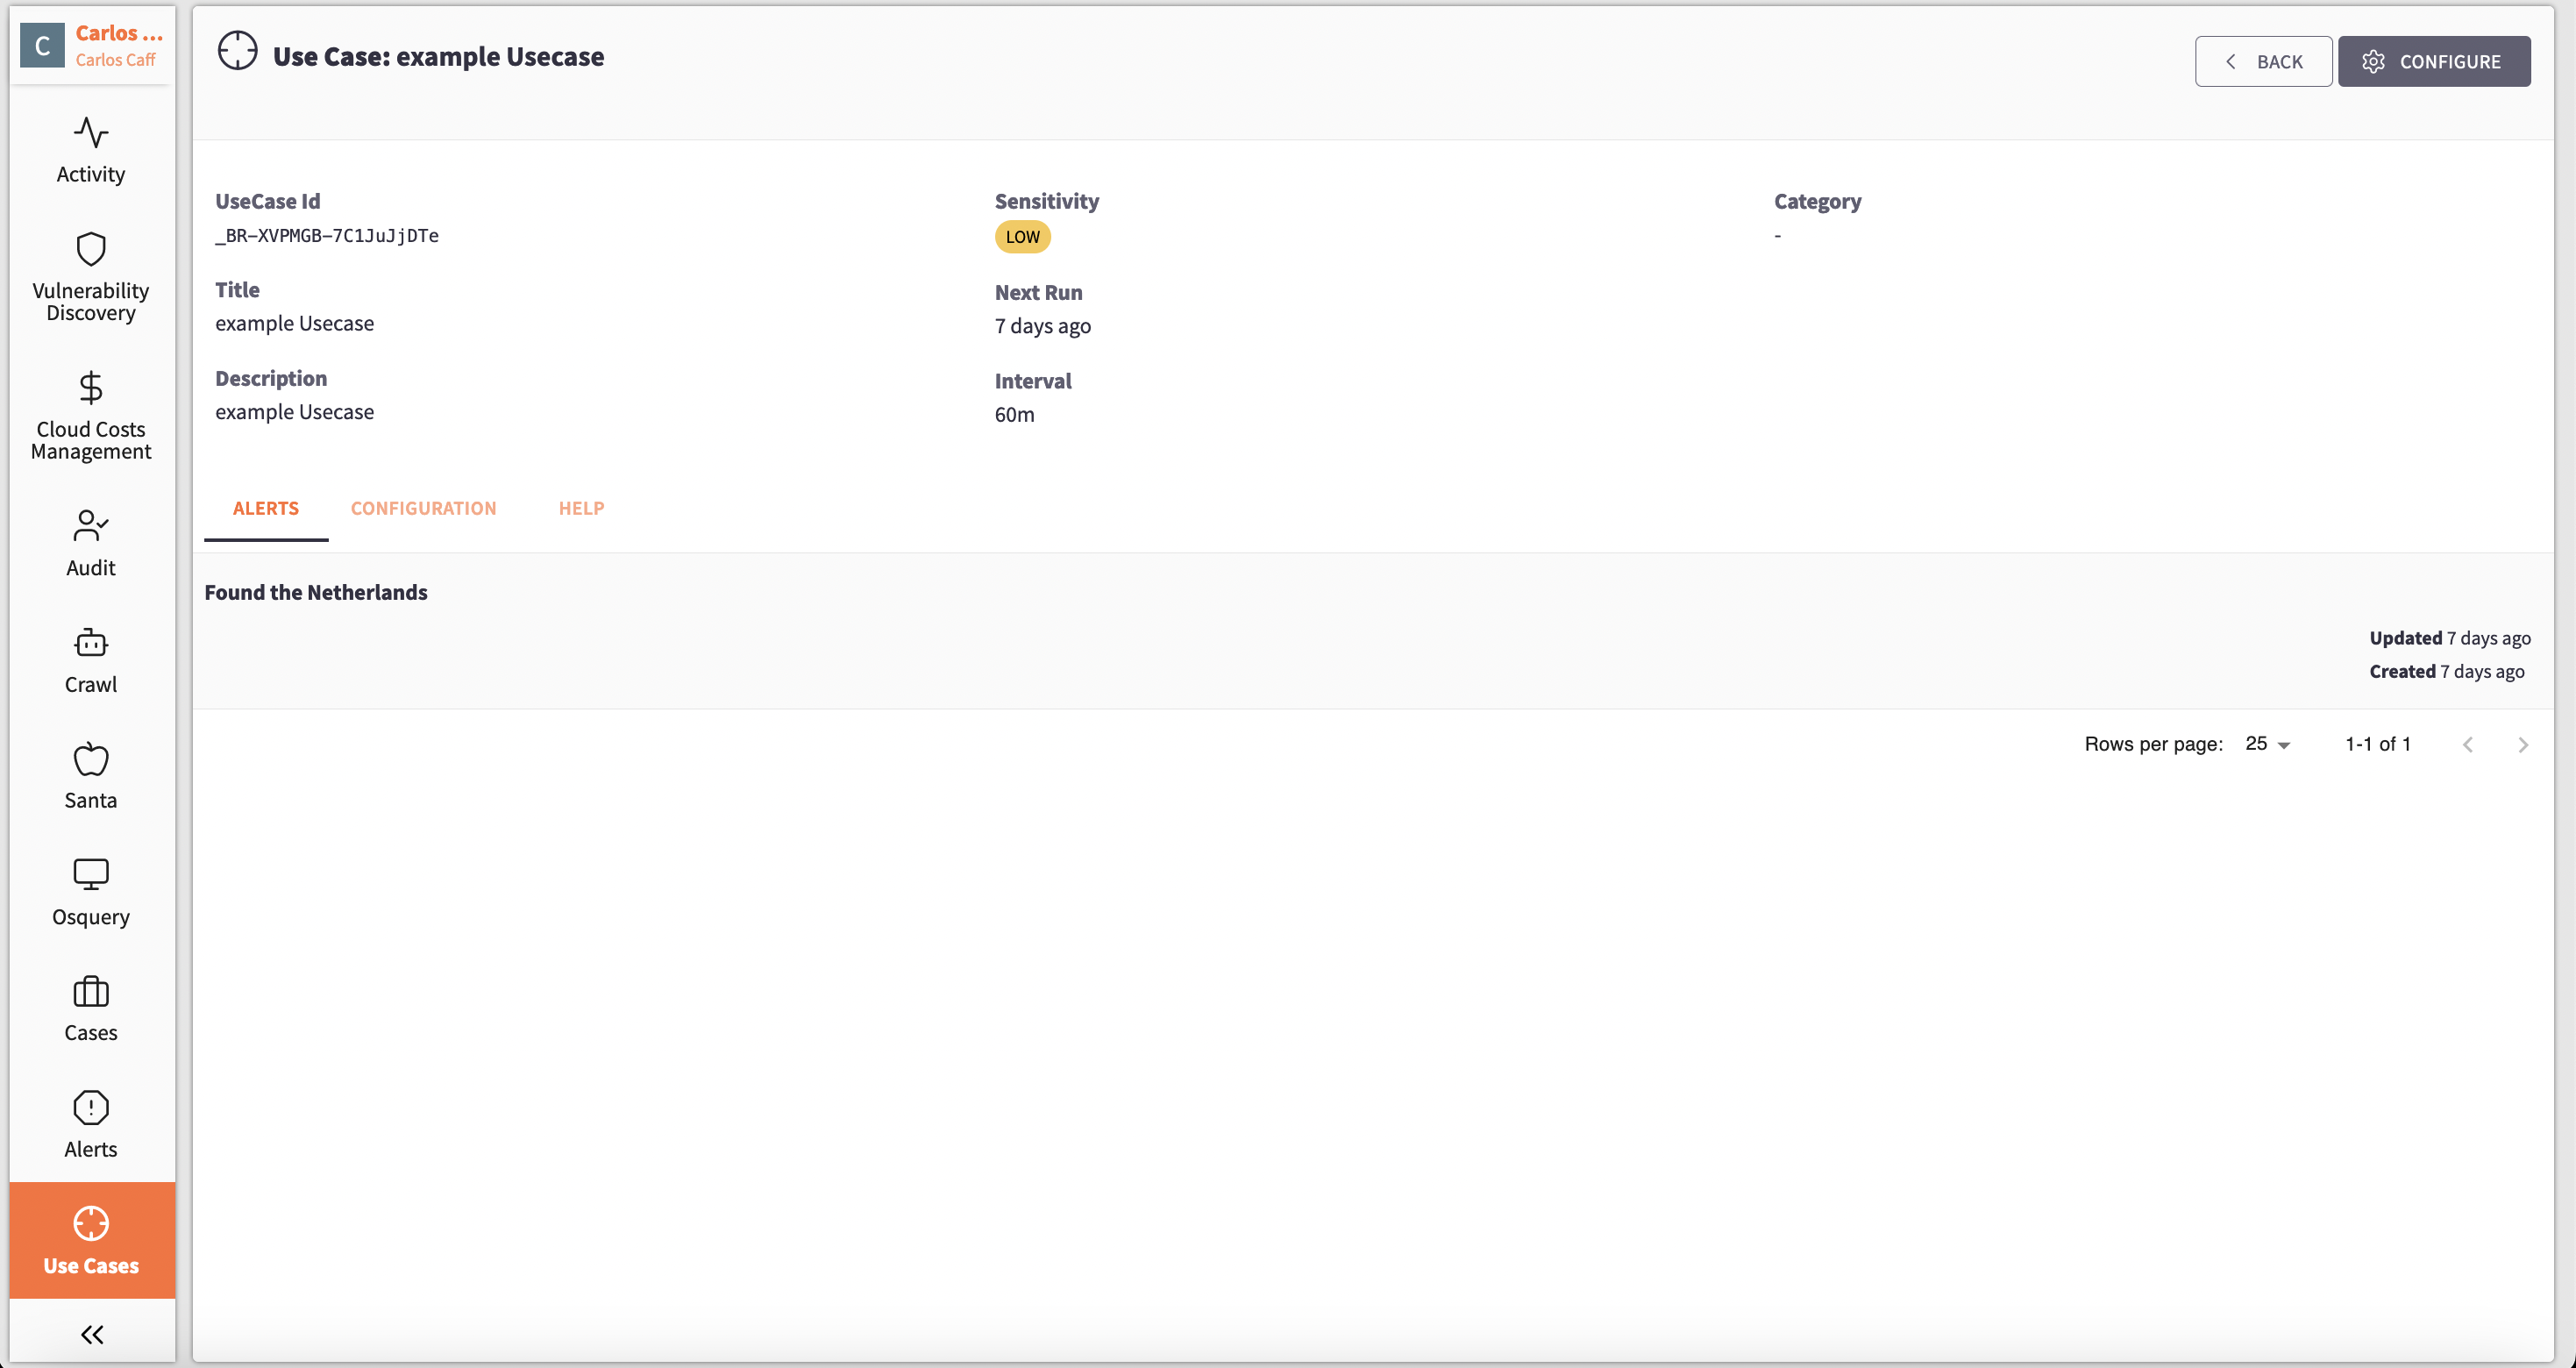
To visualize, run, and configure the UseCase within the Raven Portal, navigate to the UseCase app. Here, you can view all previously created UseCases and add new ones.
To add a new UseCase, click the ADD USECASE button in the top right corner of the Raven Portal. Once you reload the portal, you'll see that the new UseCase has been added.
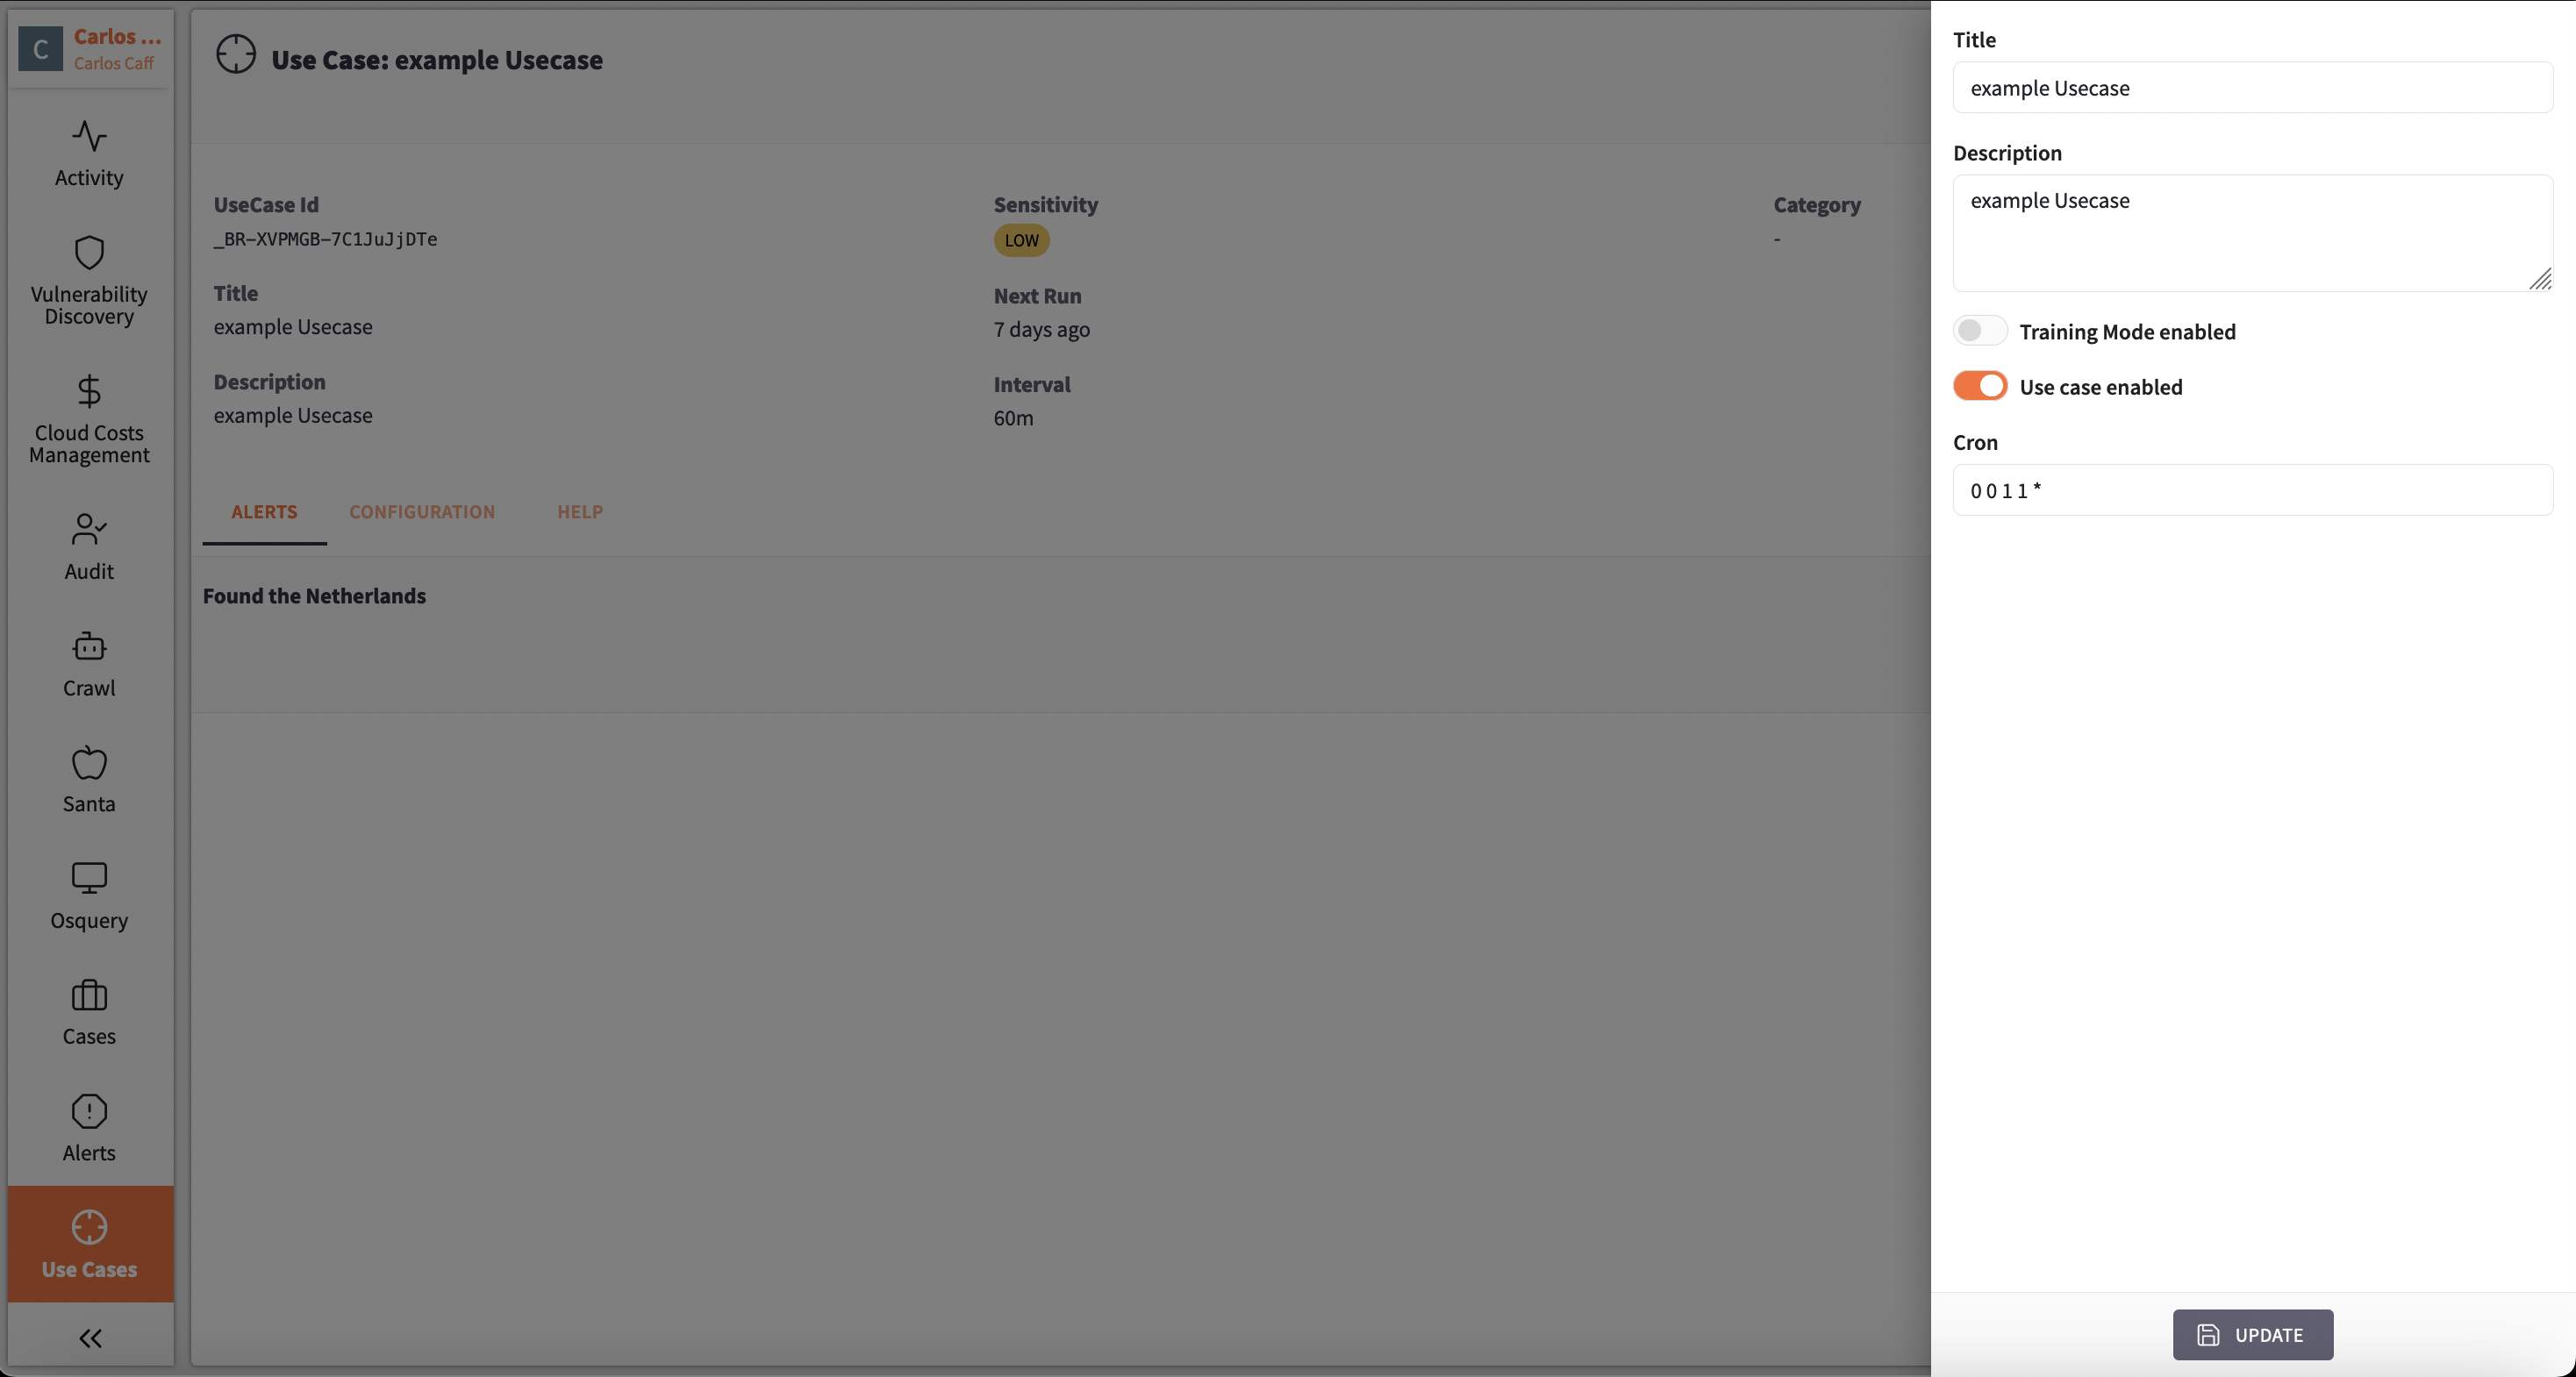
You can click on the UseCase to view general information, including:
-
Title
-
Description
-
Alerts triggered
-
Interval
-
Next run
-
UseCase ID
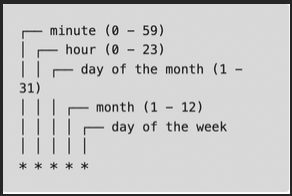
To activate the UseCase, click the CONFIGURE button in the top right corner of the Raven Portal. Disable Training mode and enable the UseCase by toggling the Use Case enabled button. Then, set up the running times by providing a cron schedule. For example:
Part 3
Alerts setup
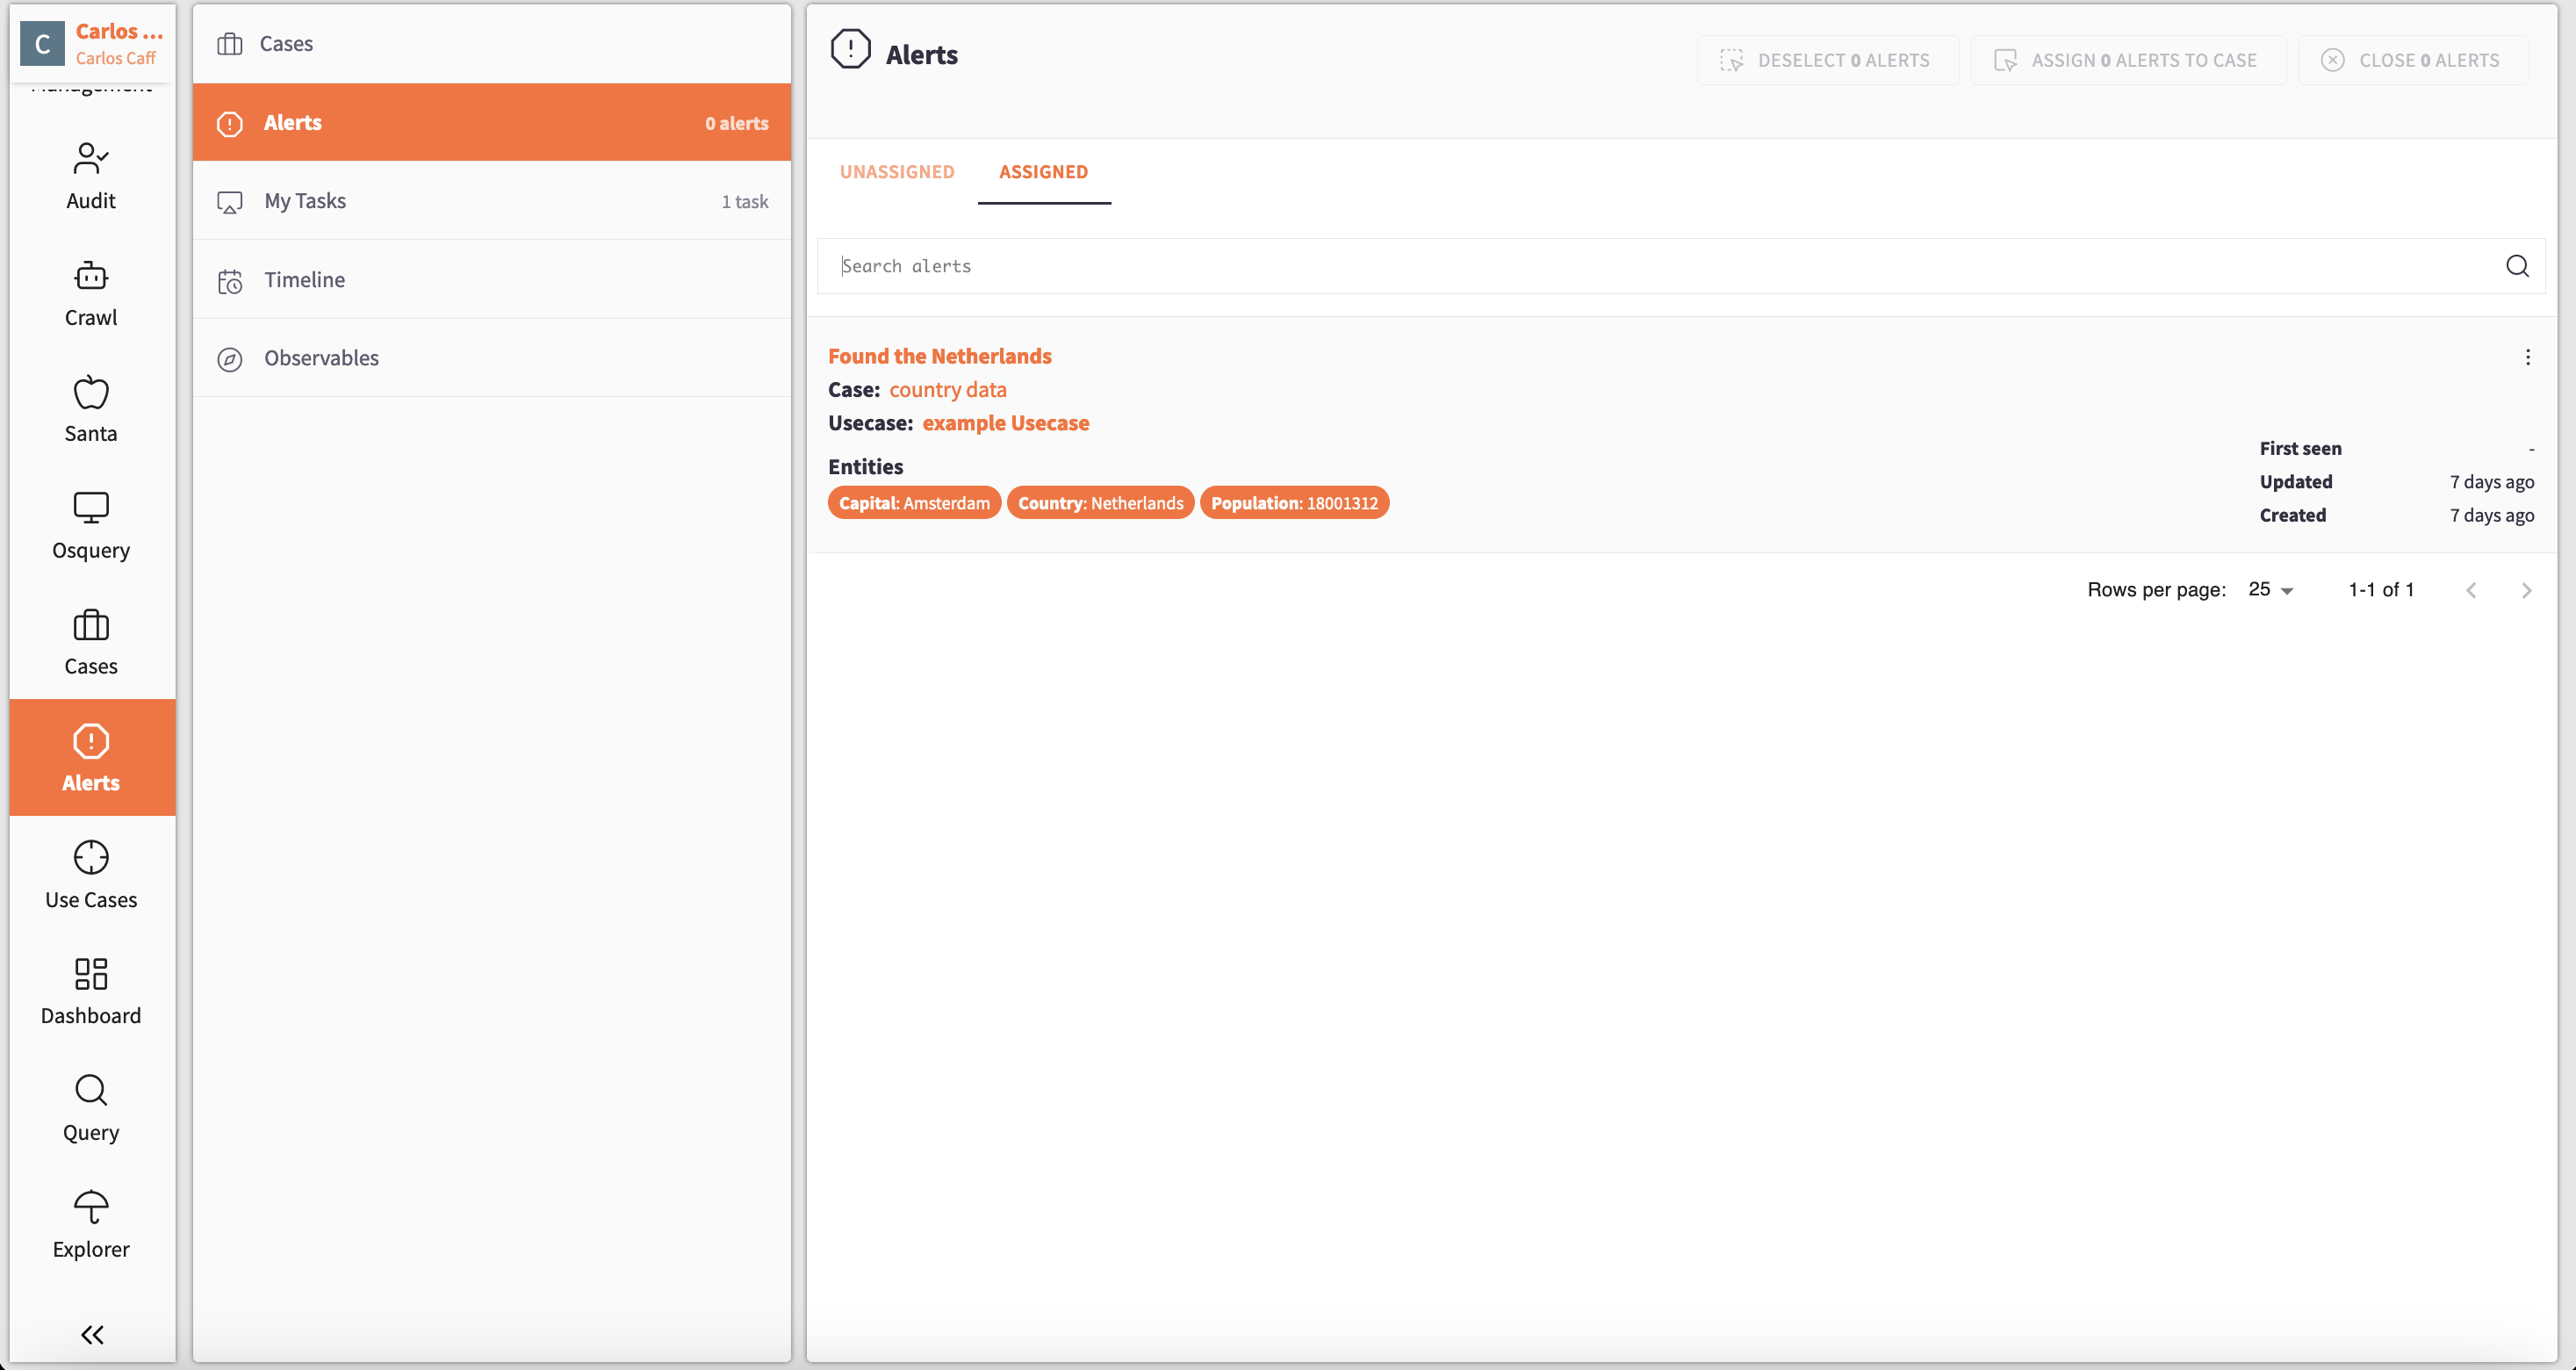
To view the various Alerts triggered by the Use Case, navigate to the Alerts app. Here, you can see all previously triggered Alerts, which are divided into two sections: unassigned alerts and alerts that have been assigned to a case.
When you select a specific Alert, a new pane will open, displaying general information about the Alert, including the associated data.
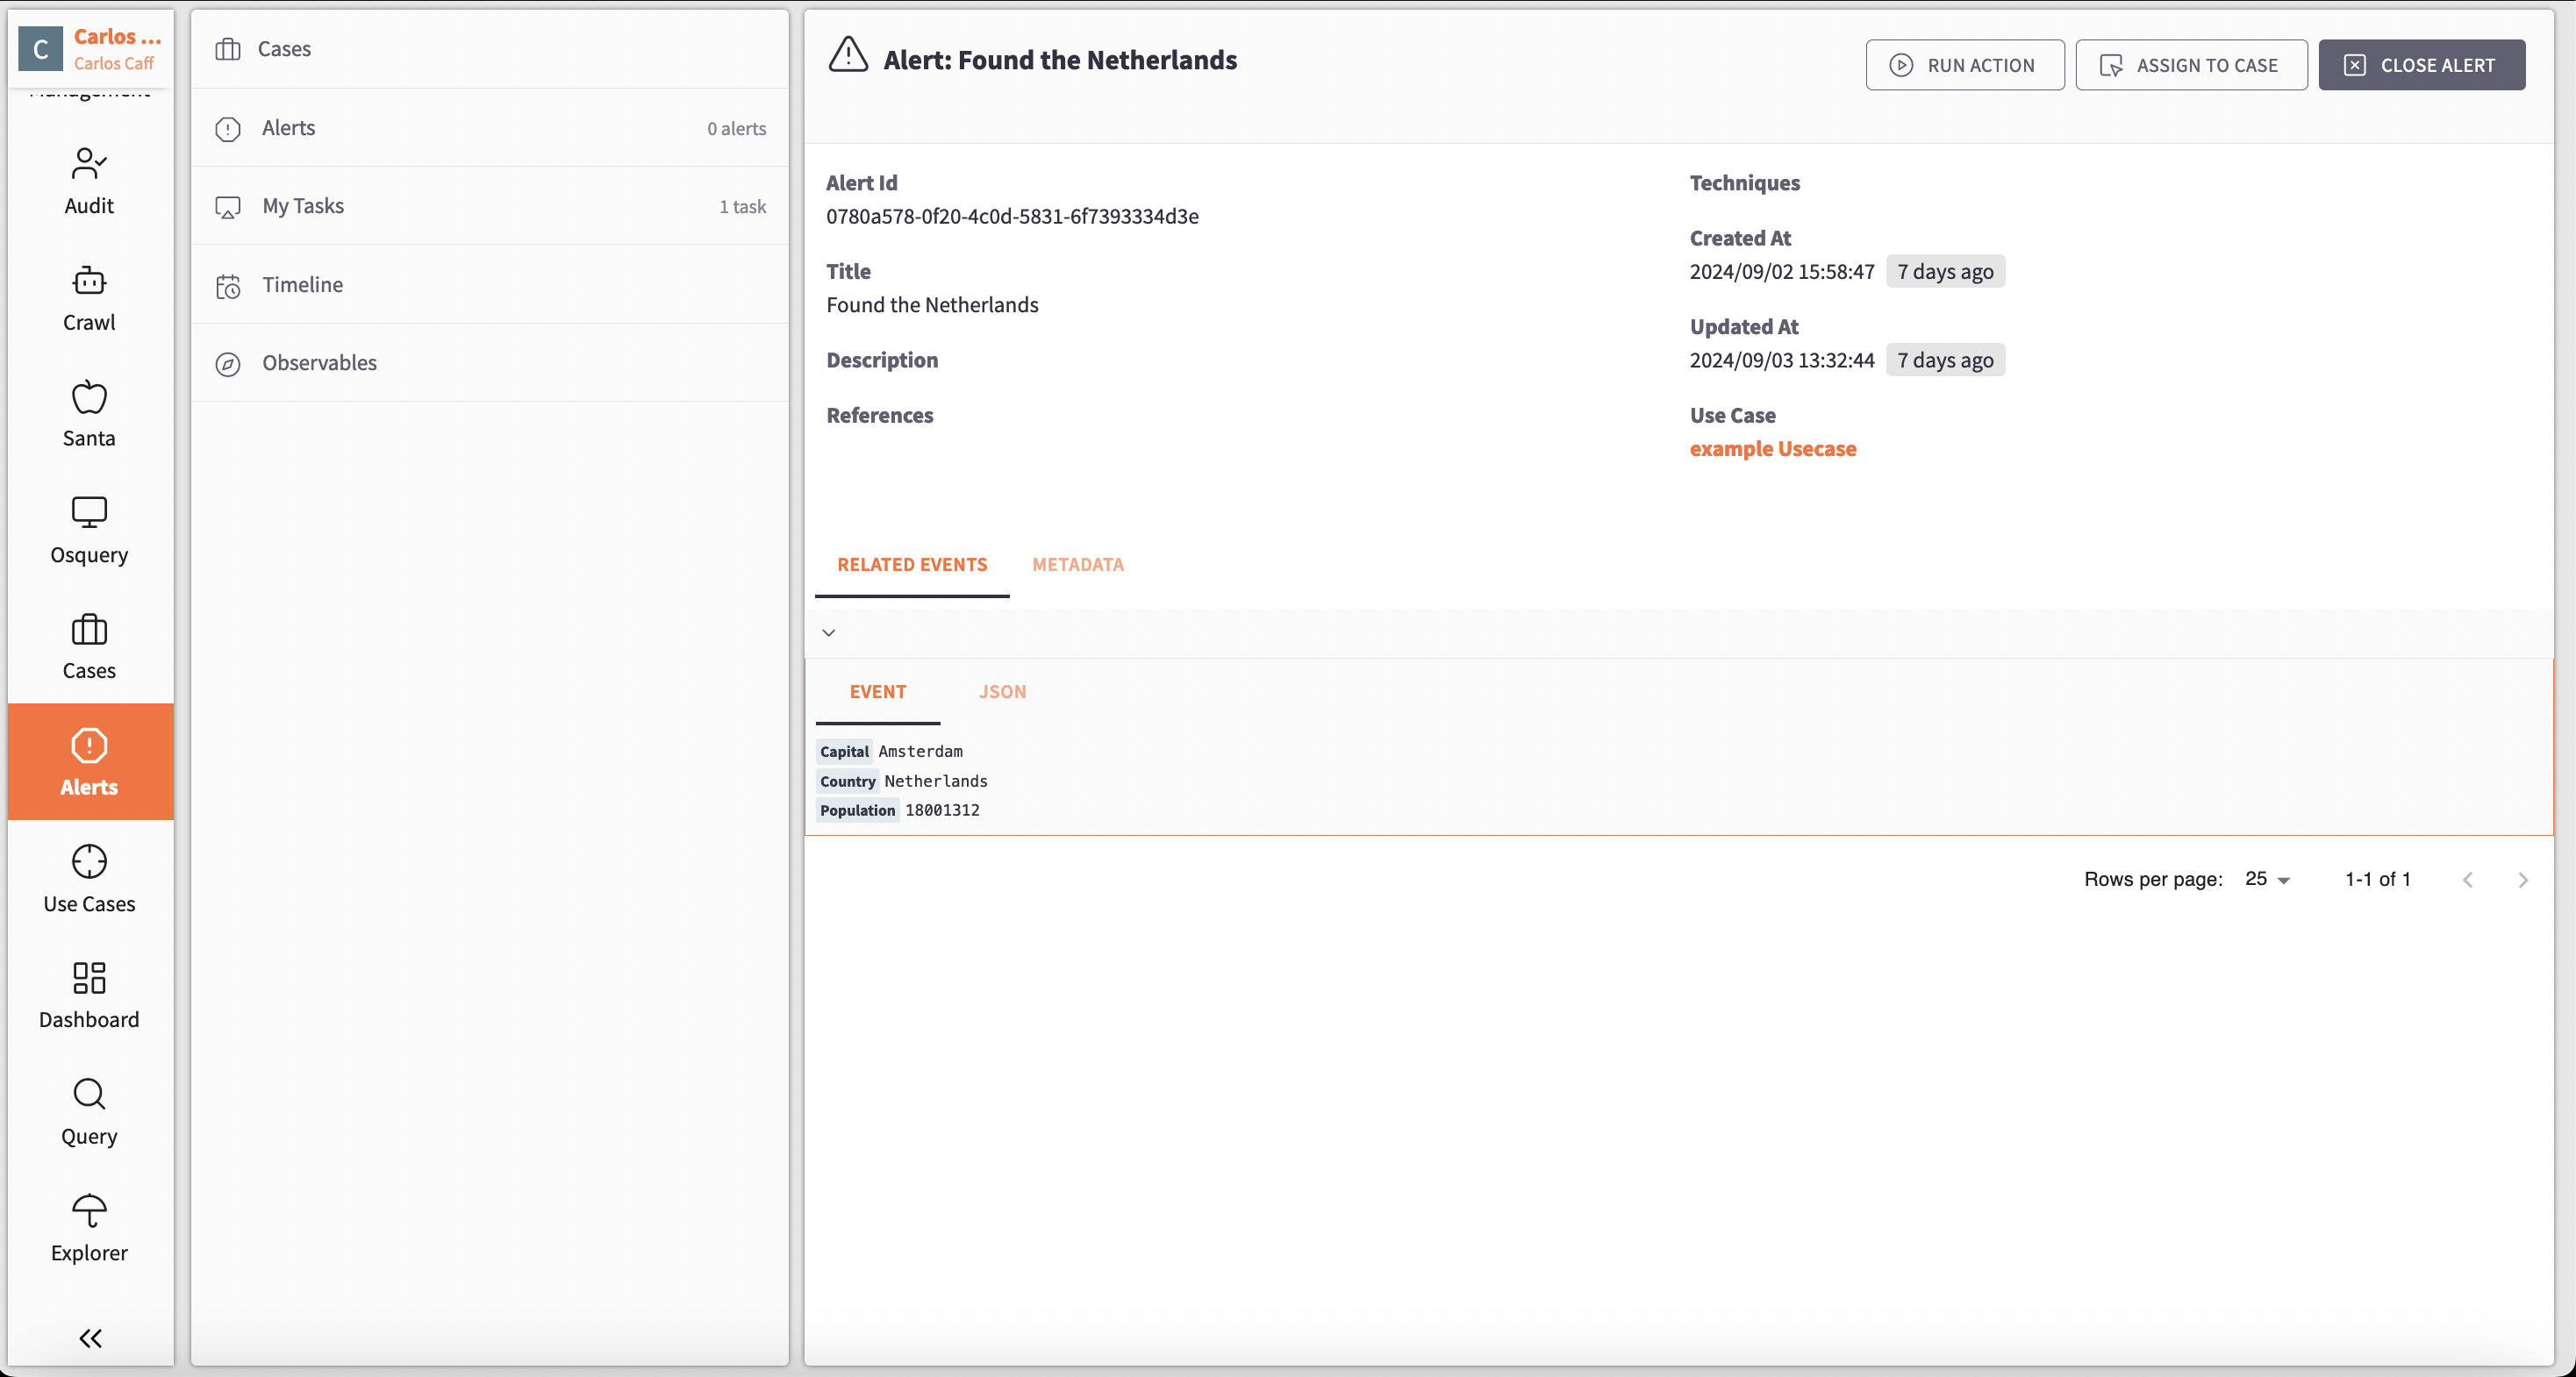
In the top right corner, you’ll find two buttons:
-
Assign to Case: This allows you to assign the Alert to a case for management or further action.
-
Close Alert: If the alert is no longer needed, you can close it.
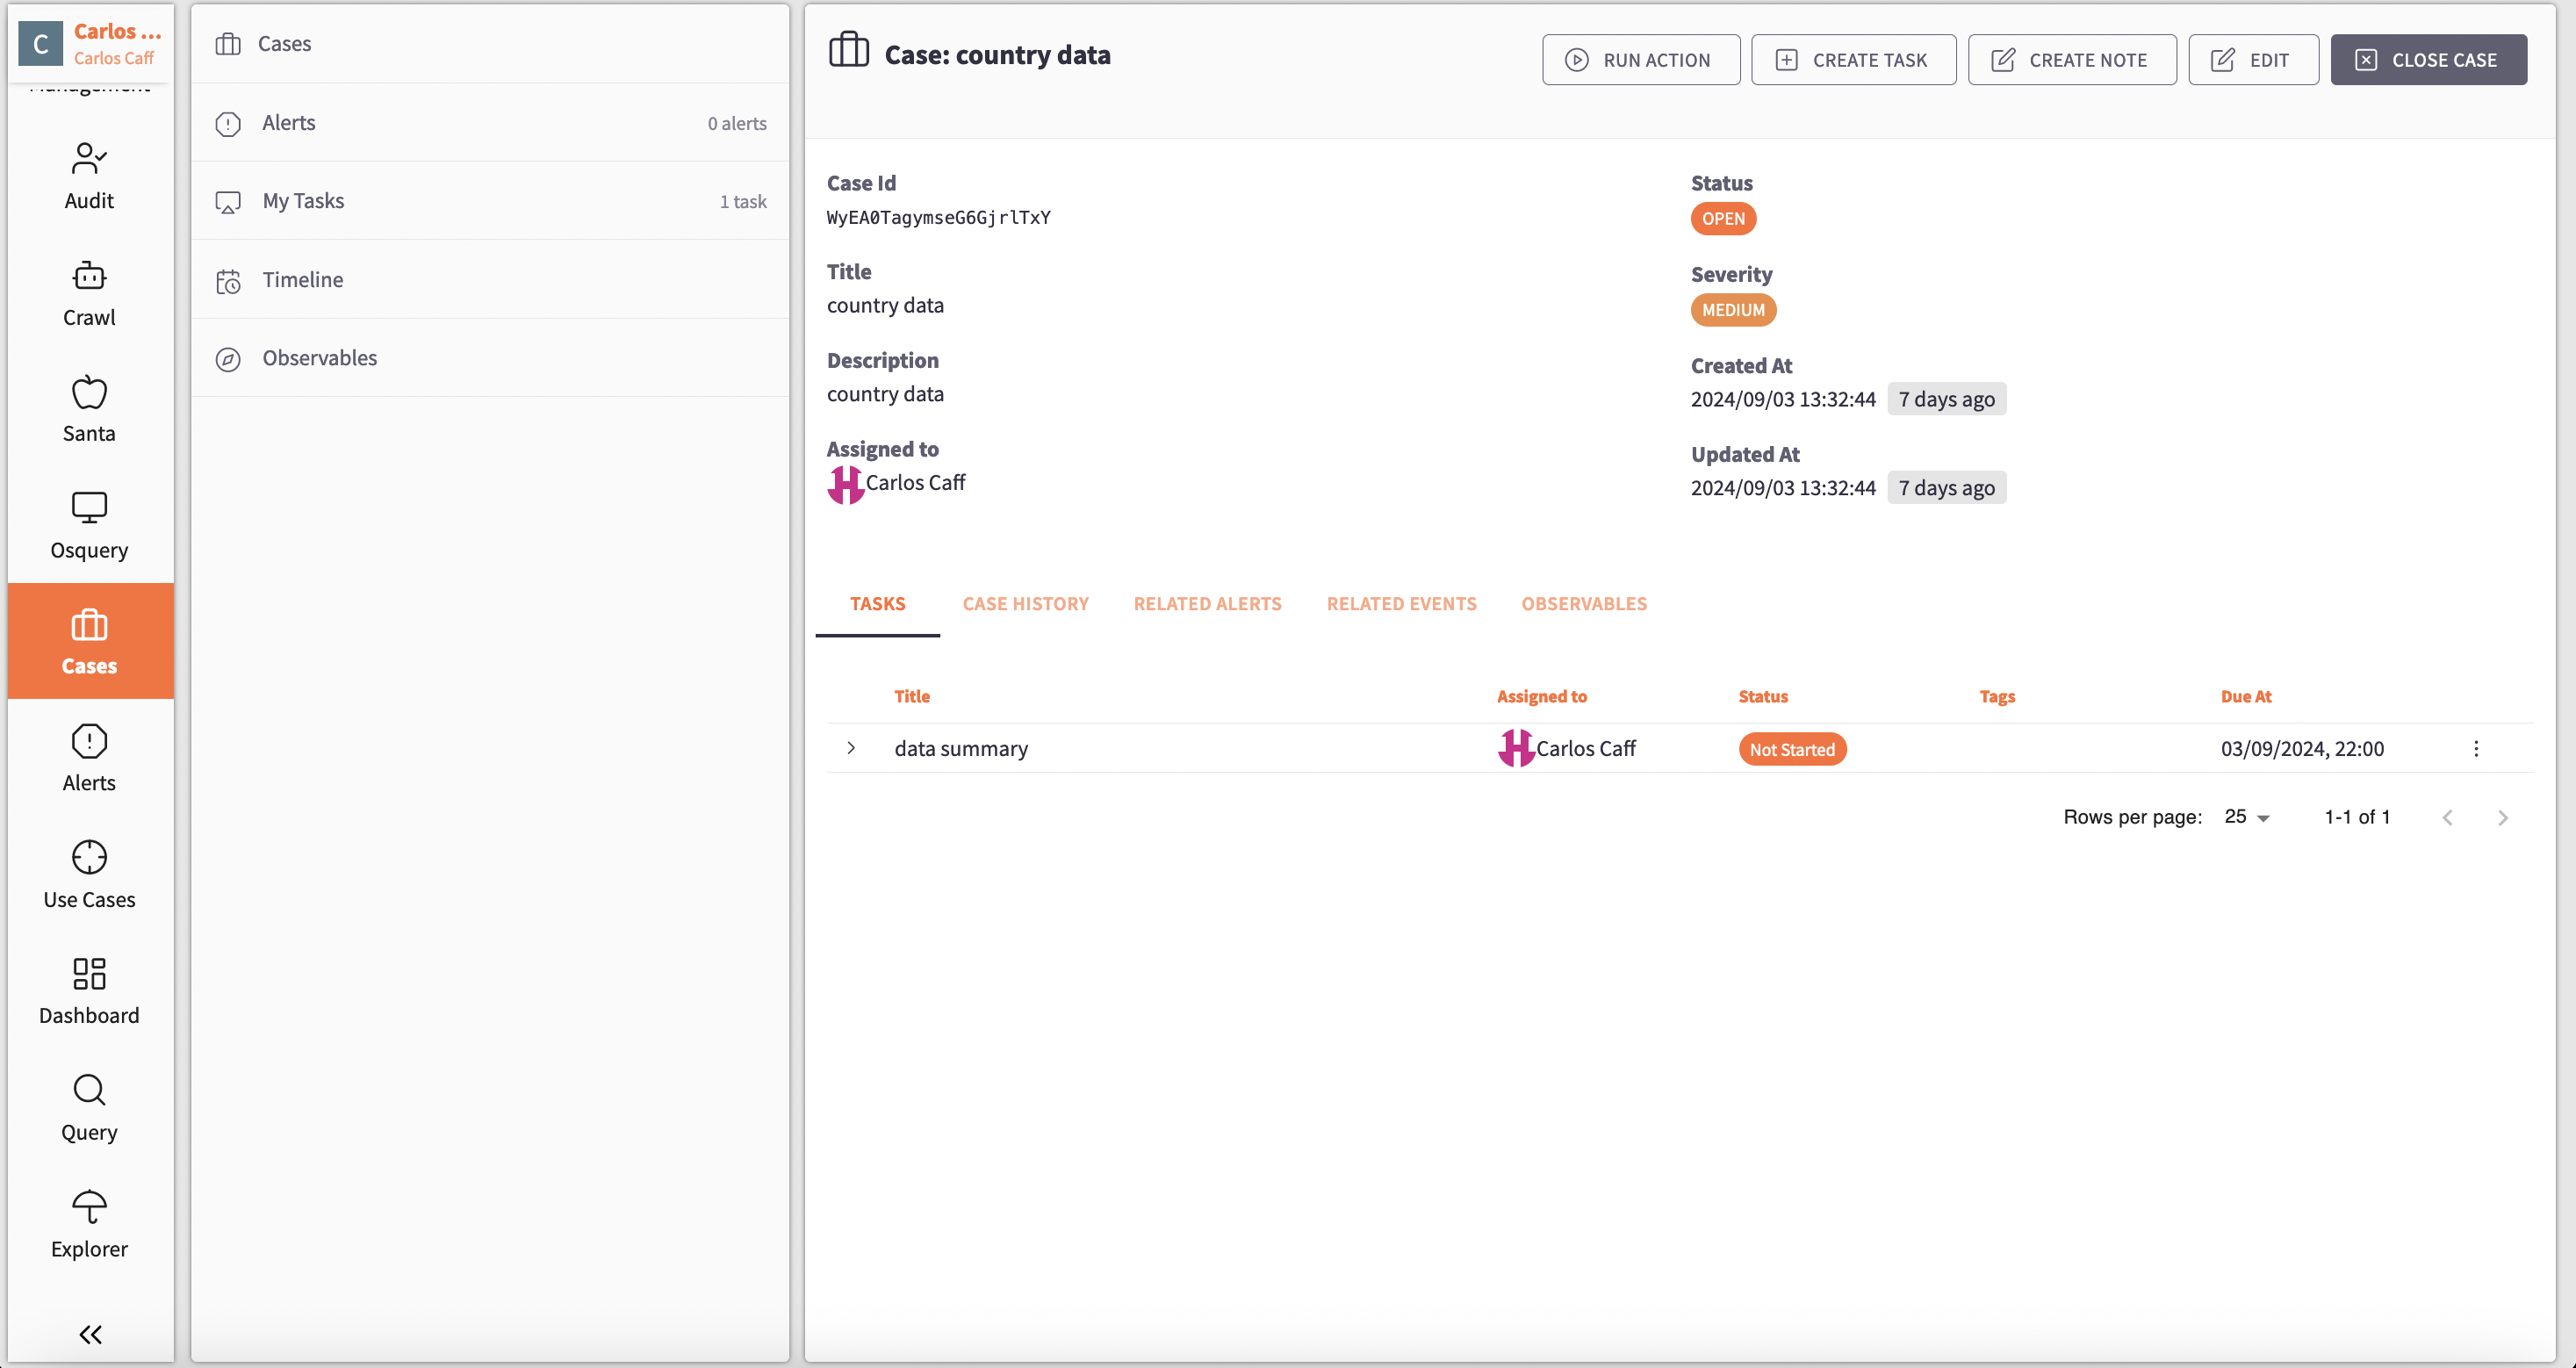
To manage and create new cases, go to the Cases App. Here, you can create cases and tasks to track their progress.
