Case Management User Documentation
| Purpose | Provide a guide for the user to effectively create and manage Alerts and Cases. |
|---|
| Last updated | October July 10, 2024 |
|---|
What is the Case Management App?
The case management app offers an overview of all Alerts generated by the various Detections. This feature allows users to seamlessly see, assign, and manage these Alerts by creating Cases. By centralizing Alert management, the app ensures that users can efficiently handle incidents, track progress, and maintain organization.
Creating and Managing Cases
To initiate and oversee the management of Alerts and Cases, you can access the "Case" app within the Portal. Once you are inside this app, you will find an interface featuring different sections that help you handling all the aspects of your Alerts and Cases.
On the left-hand side of your screen, you will notice a column with five main sections:
-
Cases
-
Alerts
-
My Tasks
-
Timeline
-
Observables
These individual sections will be expanded on in the following sections of this documentation, allowing you to gain understanding of how to navigate and use each one for Alerts and Case creation and management.
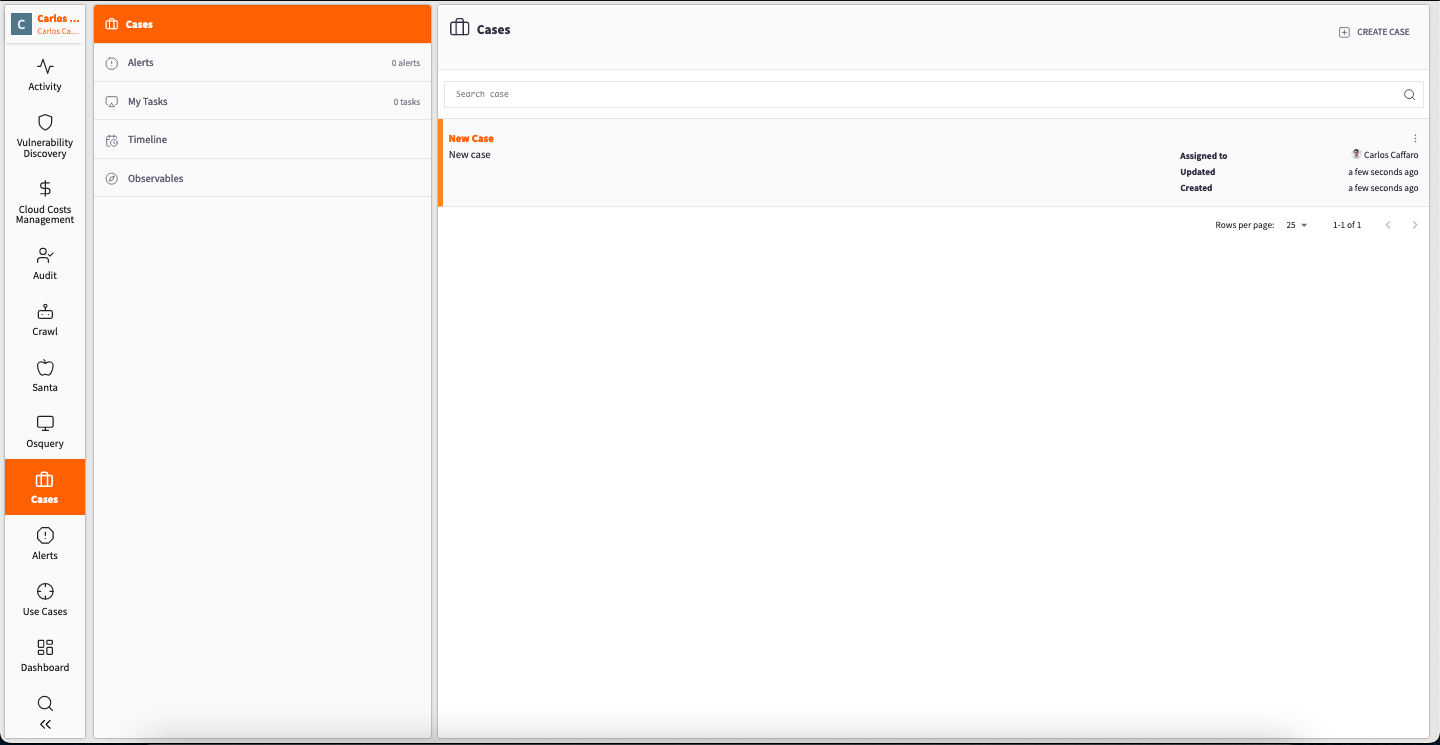
Case management interface.
Cases
When navigating to the "Cases" section, you will access an overview of all existing Cases. Each Case entry within this section will provide you with the following information:
-
The Case's title or name.
-
The total amount of tasks contained within the Case.
-
Name of the team member to whom the Case is presently assigned.
-
Timestamps for the Case's most recent updates and creation.
This view of Case details lets you track, manage, and monitor ongoing cases within the portal effectively.
At the top right corner of each Case you will find a three dotted button that when clicking it will let you: edit, merge and close a Case.
Edit a Case
Once the "Edit Case" button is selected, an editing pane will open, allowing you to modify various aspects of the Case. Within this editing pane, you can adjust the following parameters:
-
The Case's name.
-
Description of the Case, providing contextual information.
-
The assignment of the Case to a specific team member.
-
The specified severity level assigned to the Case.
This specific aspect of the case can help determining the prioritization of different Cases.
To save your edits, click the "Update Case" button located at the lower section of the editing pane. Your changes will then be saved for future reference.
Close a Case
When clicking the "Close Case" button, a new tab will be opened, letting you add any important comments or development about the case for future reference. Once you've documented these necessary details, you can proceed to finalize the Case by clicking the "Close" button located at the tab's lower section. This action marks the Case as complete and ensures organized case management.
Interacting with Cases
When you access a specific Case, a tab opens up, providing you with essential information and tools. The initial details you will find are:
- Case ID: A unique identifier for the Case.
- Case Title: The name or title of the Case.
- Case Description: A brief description of the Case.
- Assigned To: The individual or team responsible for handling the Case.
- Case Status: The current status of the Case.
- Case Severity: The level of importance or impact associated with the Case.
- Created On: The date and time when the Case was initially created.
- Last Updated: The date and time of the most recent updates to the Case.
In the lower section of the tab, you'll find various features for interacting with the Case:
-
Tasks: This section displays any tasks associated with the Case. It includes details like the Task title, assigned team member, Task status, tags, and due dates. Within the three dotted button located at the far right of each Task you can perform actions like adding a note to the Task, duplicating the Task, editing, closing, or deleting it.
-
Case History: Here, you can track the chronological history of the Case, including updates and actions taken over time. Also, any notes created in relation to the case will be accessible and can be reviewed here.
-
Related Alerts: In this section, you can access alerts generated by the use Cases linked to your specific Case.
For more information in Use Cases follow link below: Use Cases Documentation
-
Related Events: This part consists of two sections. The first section provides information and descriptions of specific events related to your case. The second section displays the JSON configurations of these events.
-
Observables: This section is currently under development and is not yet available.
Next to the case's name, you'll find five buttons with specific functions:
-
Run Action: This button allows you to connect an alert to a playbook to trigger it. When an alert is linked to a playbook, it means that a specific predefined set of actions will be automatically initiated in response to that alert.
-
Create a Task: Use this option to generate a specific Task within the Case. You can configure the Task by specifying its title, description, related Case, due date, status, priority, assignee, and tags.
-
Create a Note: This feature allow you to create notes for future reference within the Case.
As mentioned before notes van be seen in the "Case History" tab within each specific Case.
-
Edit: Click this button to edit or configure the Case settings.
-
Close: When a case is completed or no longer needed, you can close it to remove it from the list of active cases. This action deletes the case permanently.
Alerts:
The Alert section in the Portal provides access to the Alert app, where you can review various alerts generated by different Detections.
Detections are specific scenarios or situations defined in the system for monitoring and alerting purposes.
The app features useful filters to streamline the process of finding and managing alerts effectively.
Within the Alert app, you'll find two main sections:
-
Unassigned Alerts: This section displays alerts that have not yet been assigned to any specific cases. Clicking on an Alert reveals detailed information, including its Alert ID, title, description, references, creation date, last update, and the associated Use Case.
Beneath the Alert's name, you will find three buttons that provide specific functionalities:
- Run Action: Execute an action related to the alert.
- Assign to Case: Assign the alert to an existing case or create a new case for it.
- Close Alert: Mark the alert as closed when it's no longer relevant.
Finally, at the bottom of this section, you'll discover information related to events and metadata associated with the particular alert. This additional data can provide valuable context and details about the alert, enhancing your ability to assess and address the situation effectively. It's a crucial resource for a comprehensive understanding of the alert's significance and implications.
-
Assigned Alerts: Within this section, you will discover similar details to those found in the unassigned Alerts section. The key distinction is that here, you will find Alerts that are already associated with a specific Case. This section serves as a repository for Alerts that have been assigned and are directly linked to particular Cases, simplifying your workflow and making it easier to monitor and address these Alerts within the context of their respective Cases.
You can distinguish the severity of tasks through a color-coded system:
Critical: Indicated by the color red.
High: Represented by a dark red color.
Medium: Displayed in orange.
Low: Identified with a yellow color.
Informational: Shown in blue.
This color-coded system allows for quick visual differentiation of task severity, helping users prioritize and manage their tasks effectively based on their level of importance.
My Tasks
In this Case Management section, you will find a comprehensive list of Tasks assigned to you. This includes both open Tasks that require attention and closed Tasks for your reference. If you need to create a new Task, simply click the "CREATE TASK" button located at the top right corner.
Timeline
Here you will be able to see a chronological timeline of when the Alerts were created and will be able to filter by severity, Case assigned to the Alert, Use Case, Risky Users, and Risky Devices. Additionally, you can efficiently filter this timeline based on various criteria, including severity, the Case to which the Alert is assigned, the specific Use Case, risky users, and risky devices. This filtering capability enhances your ability to quickly access and review relevant information.